Help ›
Setting up your menu
You build your menu once in the back office. Every till and waiter phone gets it within a minute of saving, and so does your QR ordering menu.
1Open the Menu page
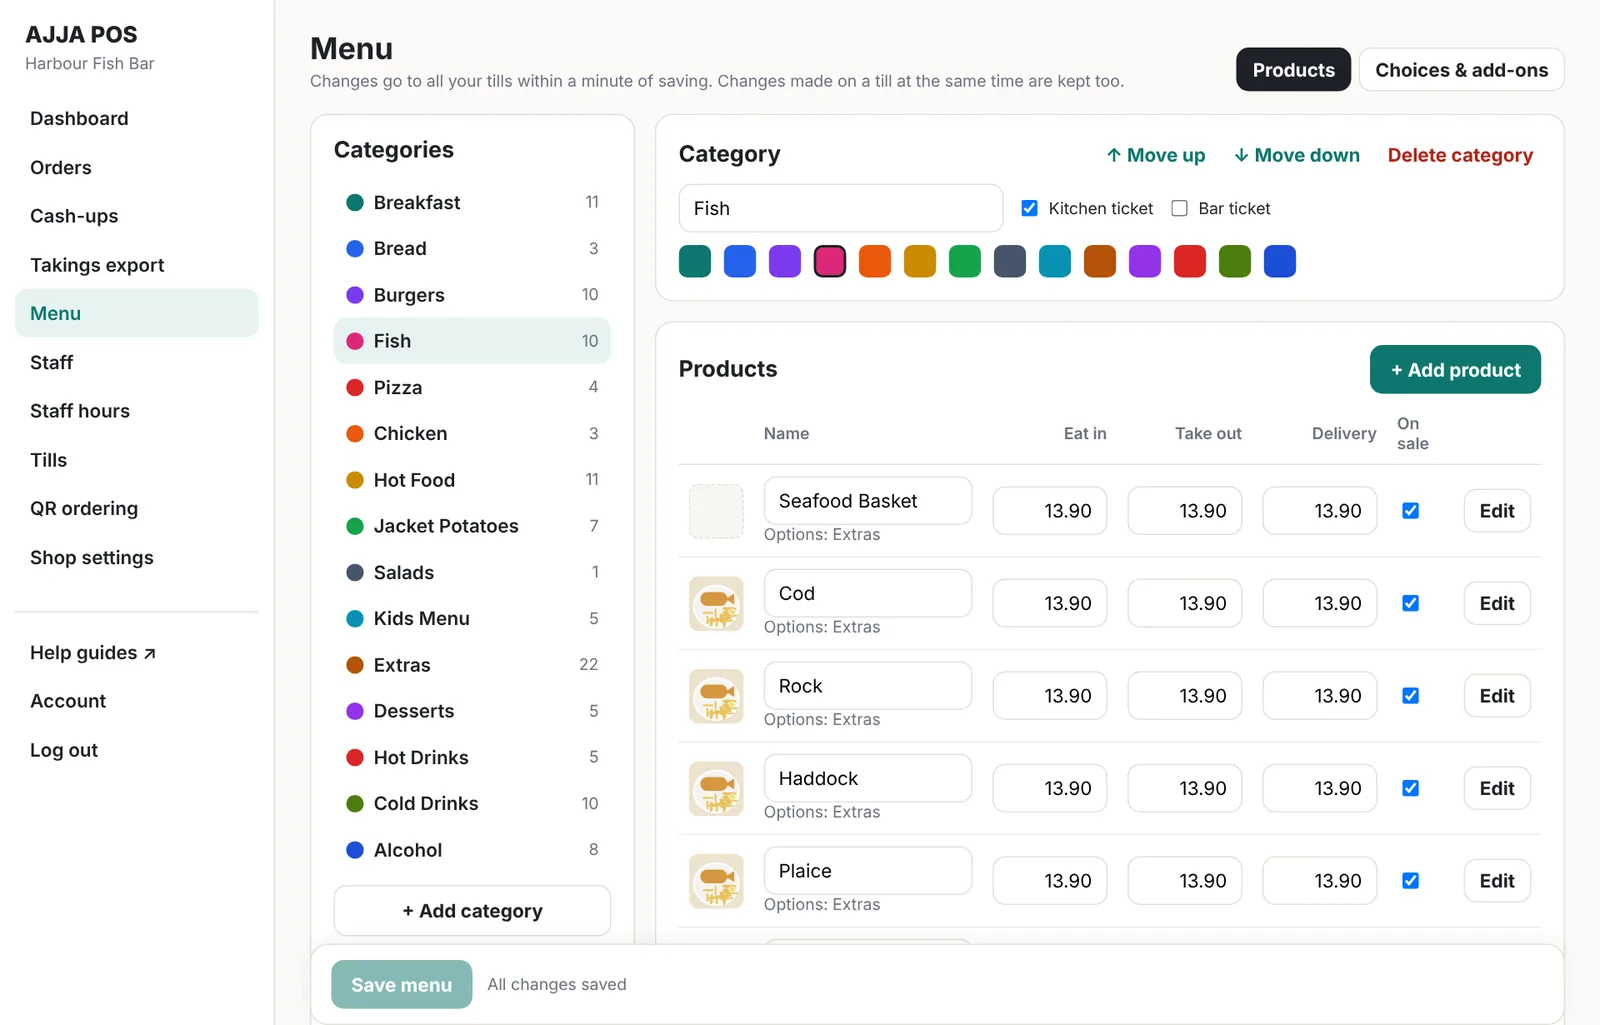
In the back office open Menu. Your categories are on the left. Click one to see its products on the right.
2Add and arrange categories
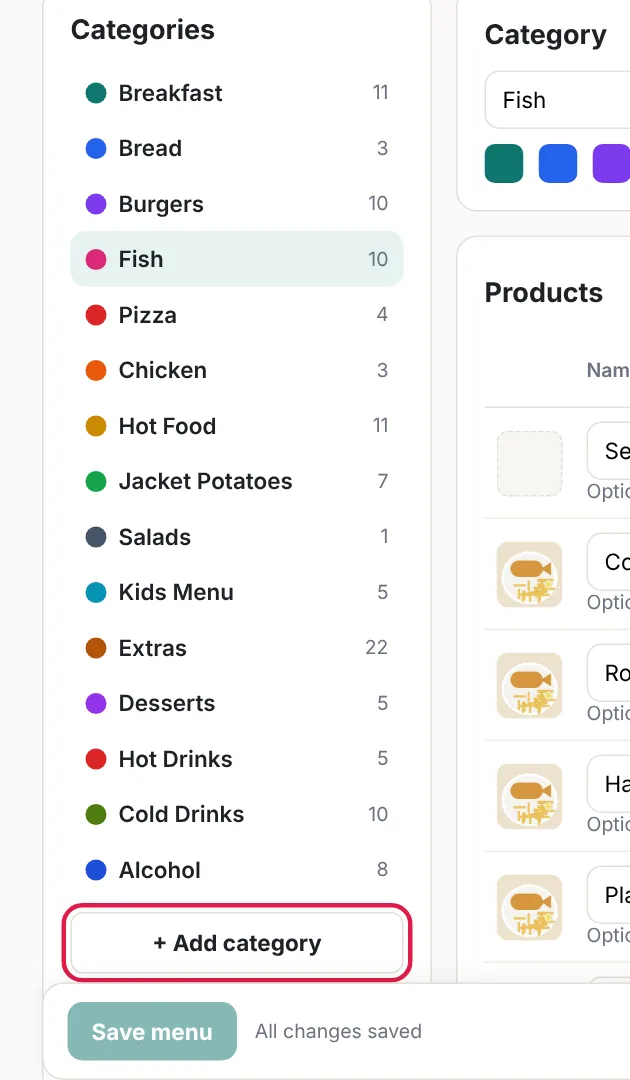
Categories are the coloured buttons on the till, such as Fish, Burgers or Drinks. Press + Add category under the list.
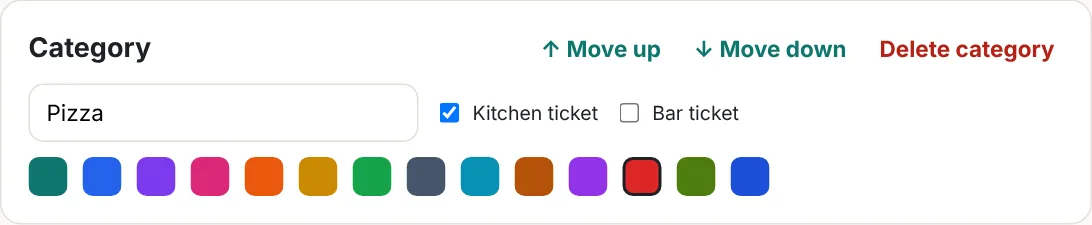
With a category selected you can:
- change its name;
- pick a colour for its button on the till;
- move it with ↑ Move up and ↓ Move down;
- choose which tickets its products print on: Kitchen ticket and/or Bar ticket.
3Add products and prices
Select a category and press + Add product. You can also change names and prices straight in the table.
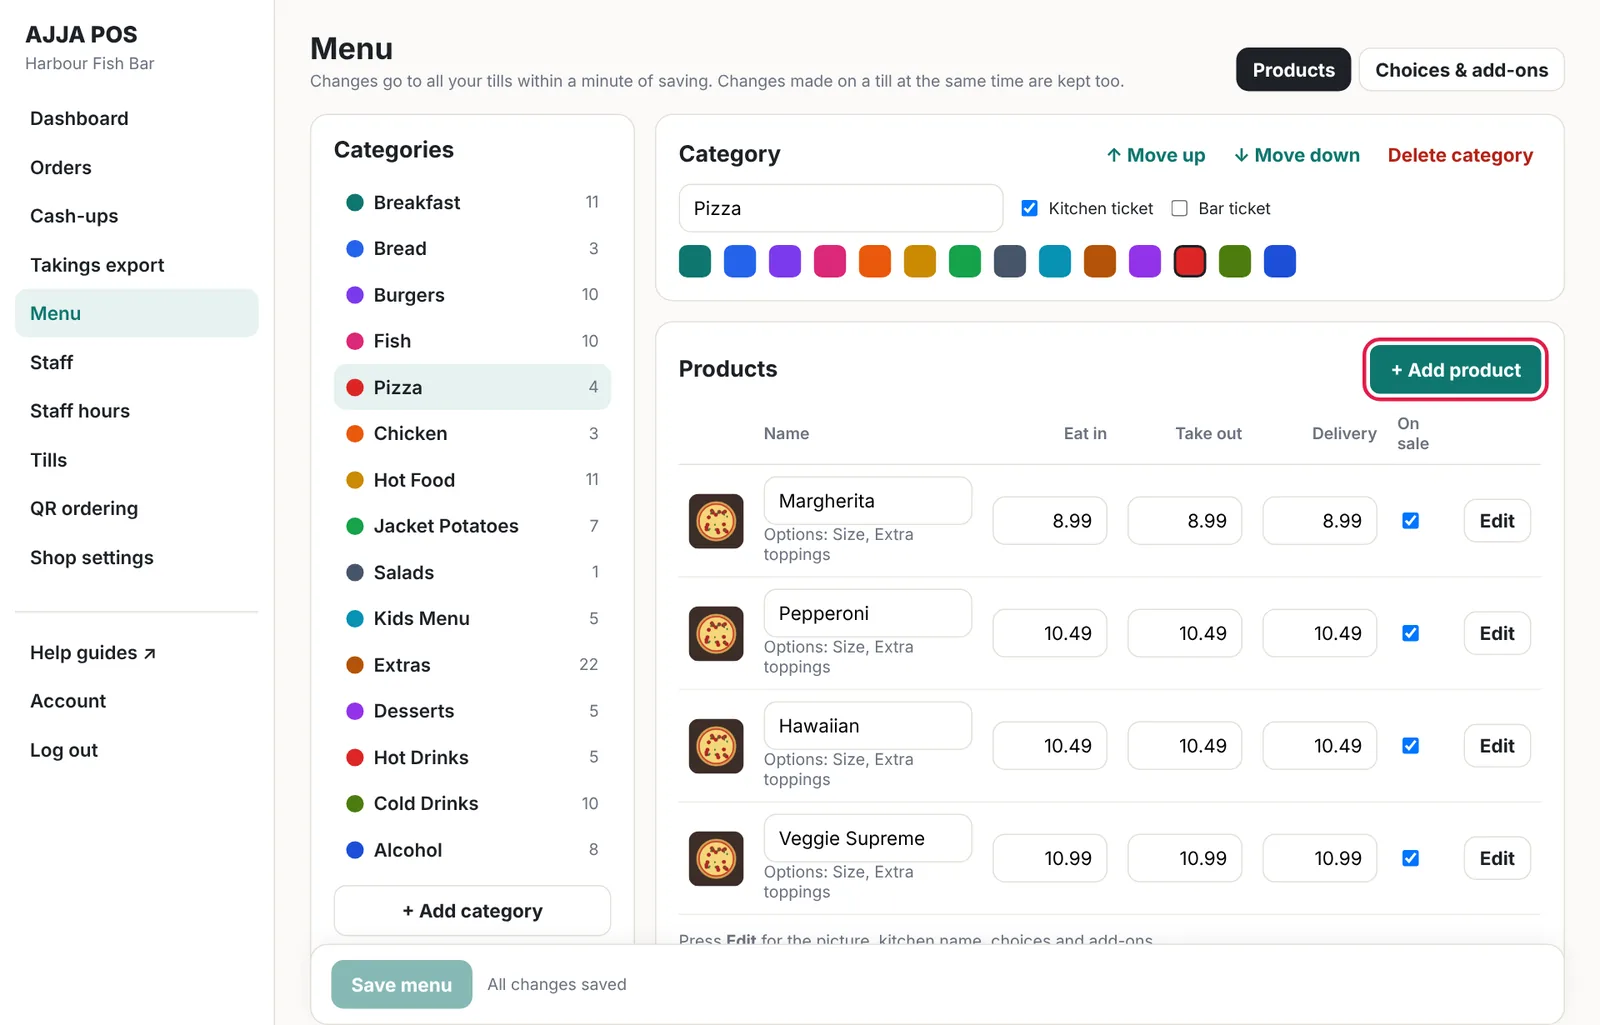
- Each product has three prices: Eat in, Take out and Delivery. They can be the same.
- Untick On sale to hide a product for now (for example when it has sold out) without deleting it.
- Press Edit for the picture, kitchen name, choices and add-ons.
4Pictures and kitchen names
In Edit, press Upload picture and choose a photo. Any phone photo works: it is cropped to a square and made smaller automatically. A square picture of at least 800 × 800 pixels looks best.
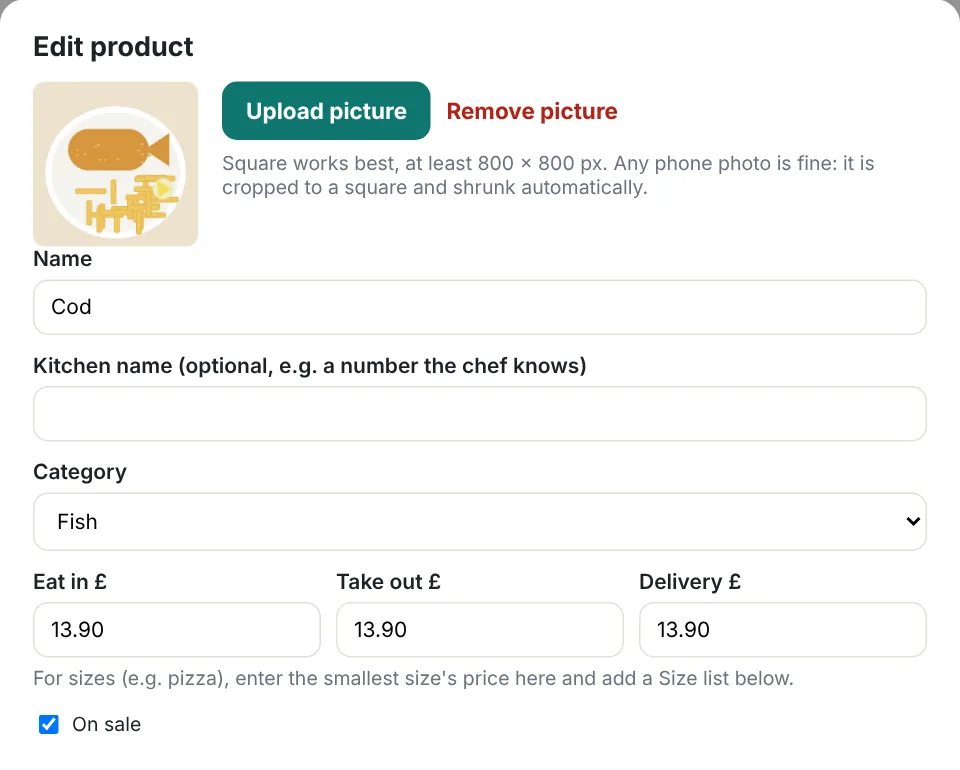
Kitchen name is optional: a short name or number your chef knows, printed on kitchen tickets instead of the full name.
Press Done, then Save menu.
5Choices and add-ons
Choices and add-ons are lists you make once and then use on as many products as you like. Open the Choices & add-ons tab at the top of the Menu page.
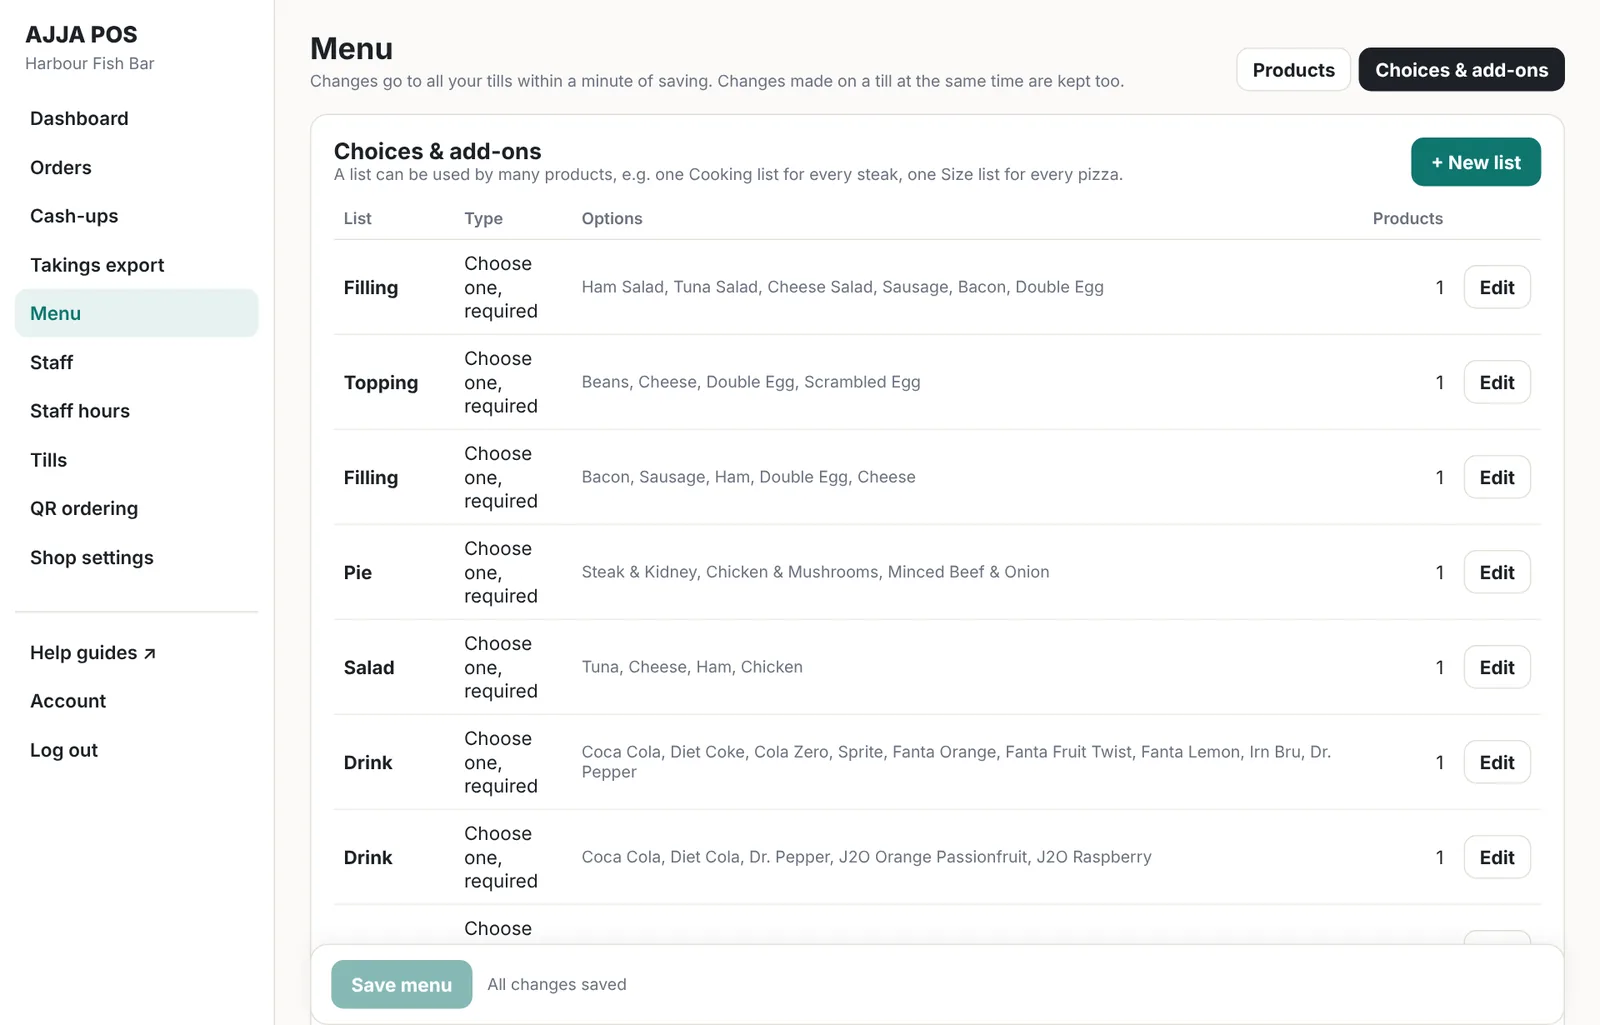
Press + New list, give it a name and choose its type:
- Choose one, required: staff must pick one, for example Cooking: rare, medium, well done.
- Choose one, optional: staff may pick one, for example Sauce.
- Add-ons, any number: staff can add as many as they like, for example Extras: cheese, bacon, egg.
Add the options with + Add option and give each a price. An empty price is free.
Then open each product with Edit and tick the lists it should use. On the till, tapping that product asks for its choices and add-ons.
6Example: pizza with sizes
Pizzas usually cost more in bigger sizes, and so do the toppings. Here is how to set that up.
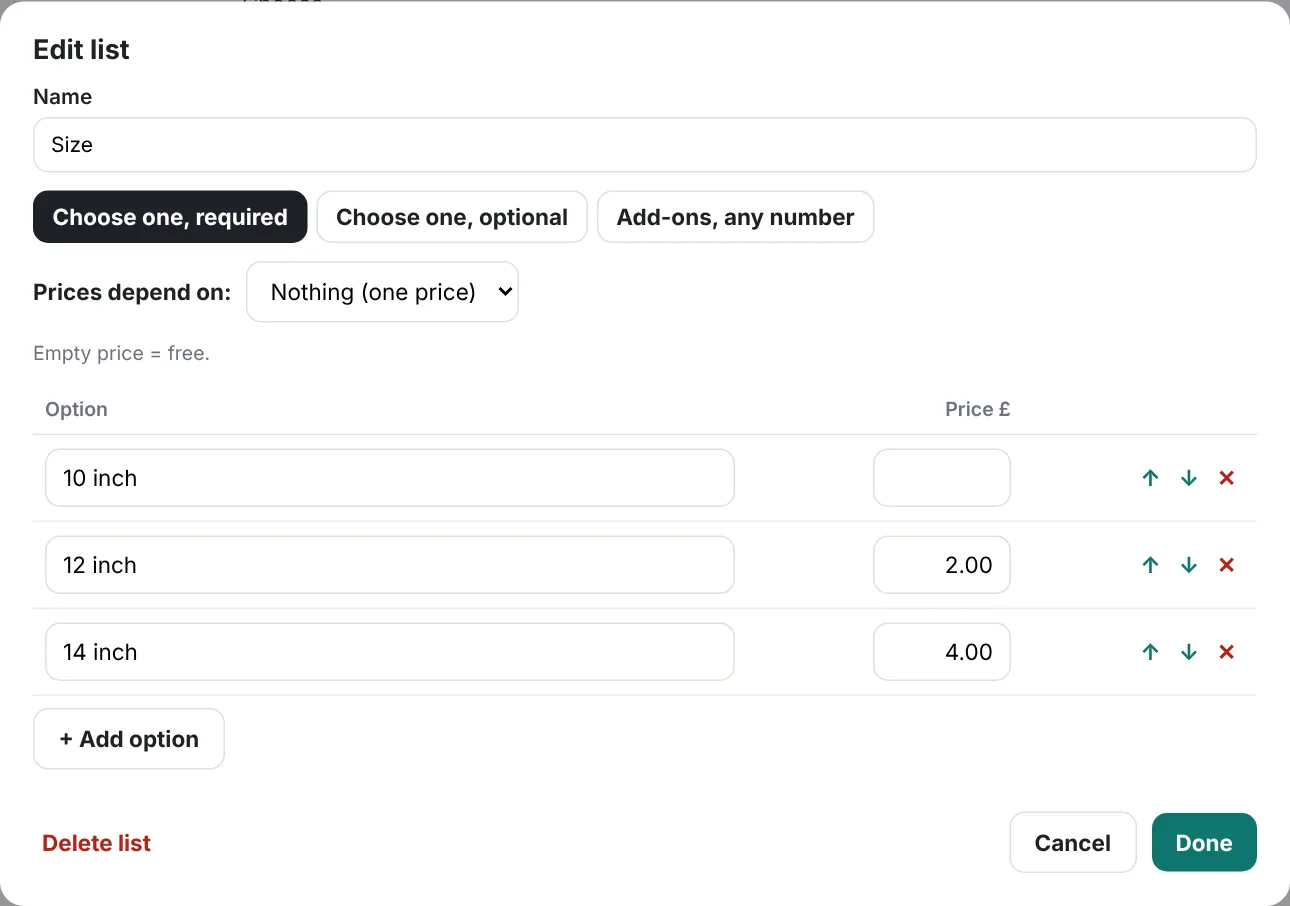
a. A Size list. Make a list called Size, type Choose one, required. Add 10 inch, 12 inch and 14 inch. Leave the smallest size empty (no extra cost) and give the bigger sizes the extra they cost.
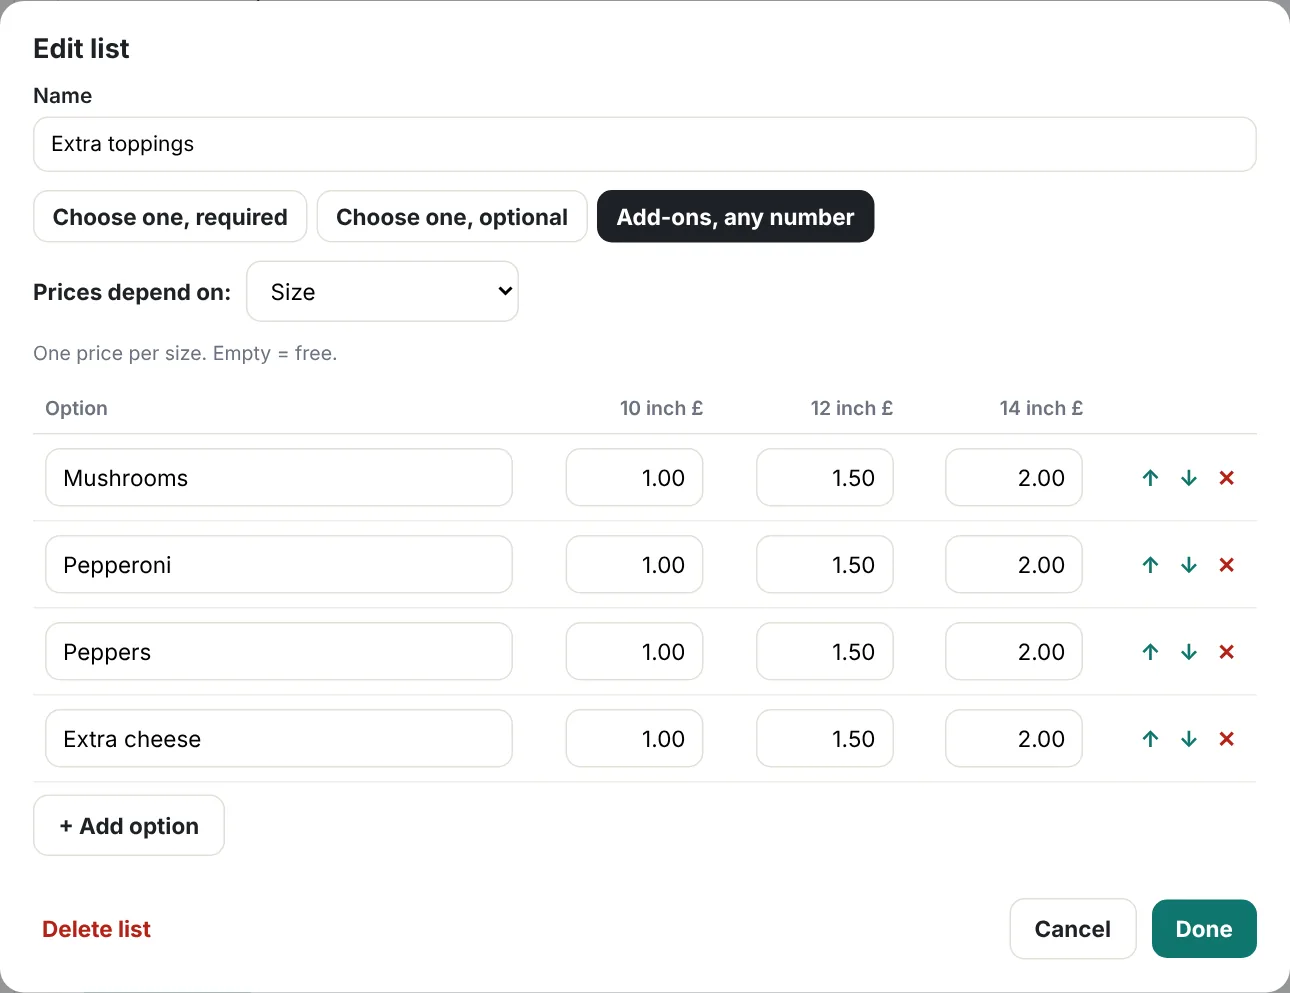
b. A toppings list priced by size. Make a list called Extra toppings, type Add-ons, any number. Set Prices depend on to Size: now each topping has a price for each size.
c. The pizzas. Give each pizza the price of its smallest size, then tick Size and Extra toppings in its Edit window.
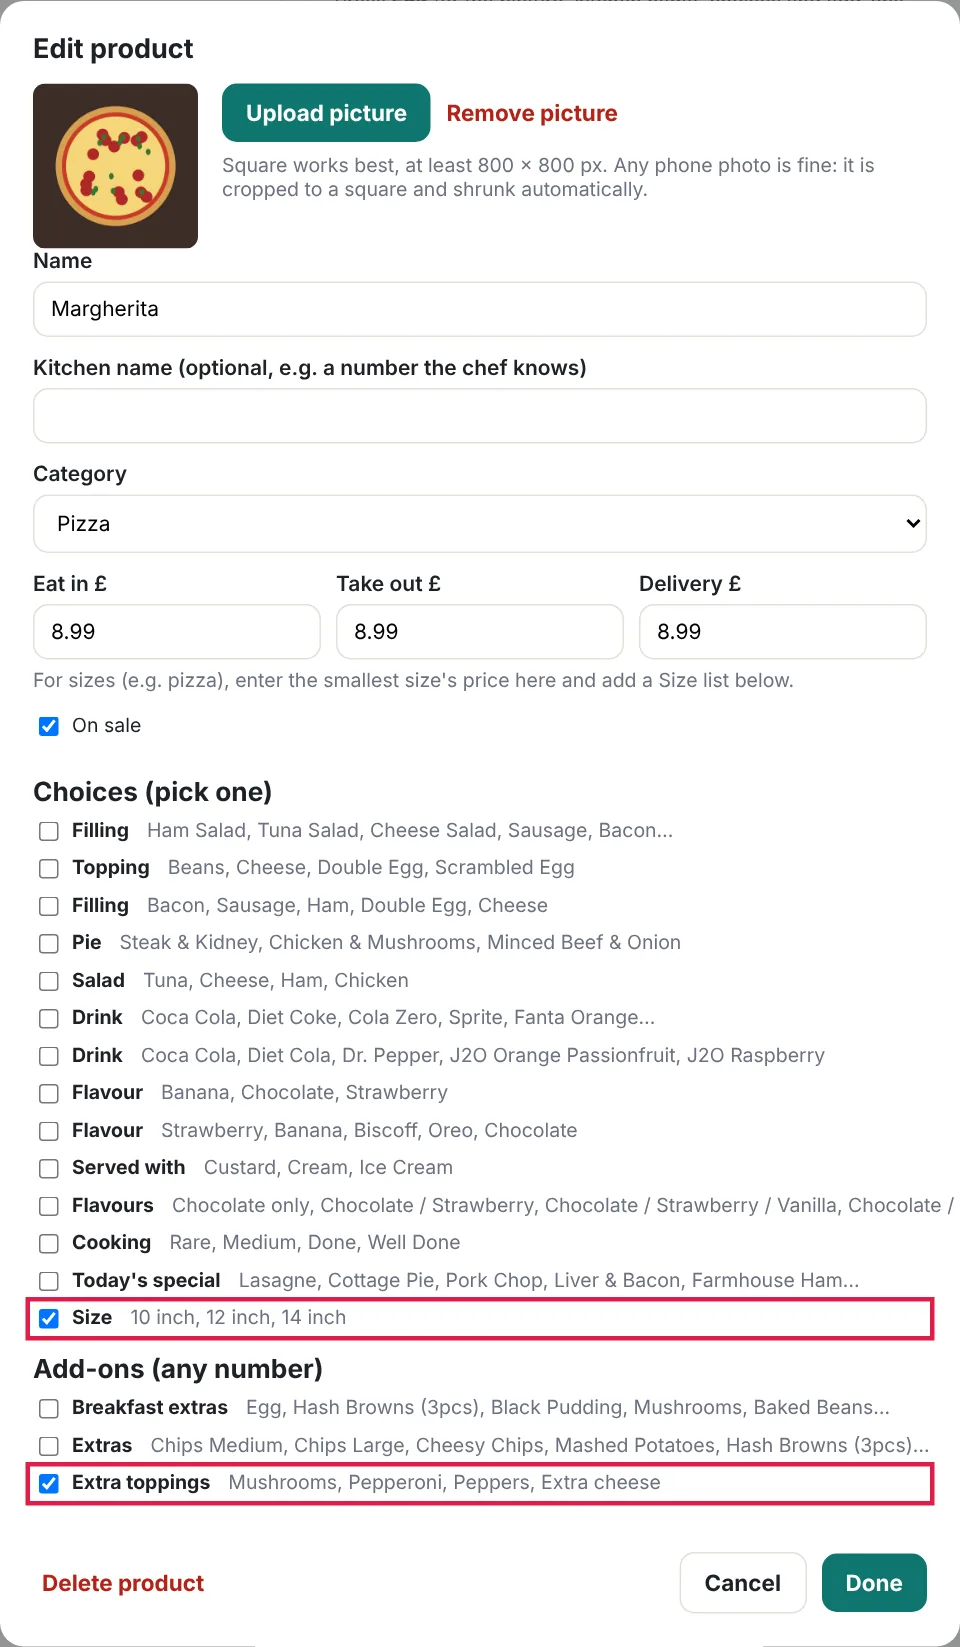
A 12 inch Margherita with mushrooms is now £8.99 + £2.00 + £1.50 = £12.49. Press Save menu.
7Menu changes made on a till
Managers can also change the menu on a tablet (Settings → Menu). Changes made on a till and in the back office at the same time are both kept.